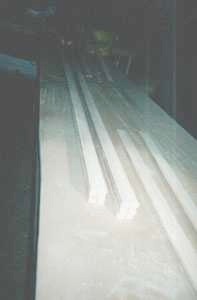

If you build a boat like the EUN MARA, you'll be doing a lot of this. "This" being- making 1/4 inch thick strips for laminating parts from. These will be the station frames at stations 3 and 4. Along with two large deck beams, they will ease the forces of the mast and rig into and along the hull structure.

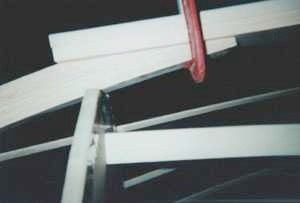
A frame shown glued up under our heat lamp array. The weather was still cool when I laminated the frames. It has since warmed up nicely.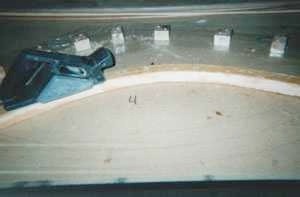
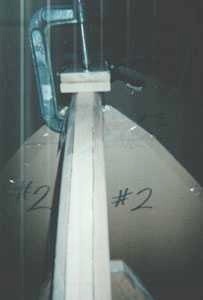
Once the epoxy has set, the frame sides are cleaned up and sided to 1 1/2 inches with my trusty B&D planer. You'll NEED one of these in your tool kit!
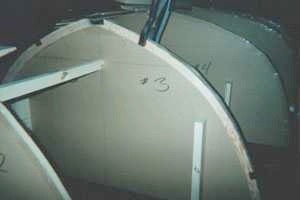
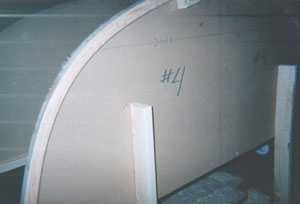
This is what it looks like with the frames trial fitted at station 3. Each half will be held in place with two small blocks of scrap wood with a single screw into the frame at each blocking point. These are fitted before installing the keelson as it's much easier. Be sure you can remove the screws when the planking is in place. We used a router with a round-over bit to finish the frames' interior edges.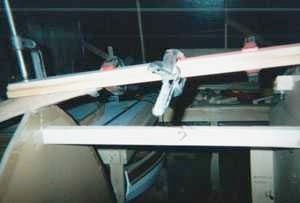
After the frames are fitted at stations 3 and 4 the keelson can be laminated on the building frame. Here the scarph joint between the keelson (2 layers of 3/4 inch stock) and the inner stem is checked and adjusted, if necessary, with the planer.
Once the fits are correct fore and aft, the keelson is laminated. You'll need lots of clamps here. We did not glue the inner stem, frames, and stern to the keelson in this operation as we wanted to clean up its edges with the planer and round-over the inner edges to save interior finishing time later on.
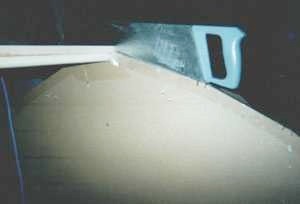
Here a saw is used to make a cut into the keelson to act as a guide for fairing with the planer. The idea is to cut from the keelson's centerline to the outer edge of where the garboard will lie. At some stations the cut doesn't completely reach the center of the keelson. The handle of the saw is placed there in the picture. This is done at each station, port and starboard. I remove most of the wood with a power planer then do the last bit with my trusty block plane.
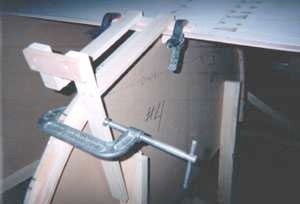
Once all is fair with the stem, stern, and keelson, the flats are machined on each frame so the planks will lie fairly and at the correct bevel for the station. Iain shows the laminated frames inside the planking on his plans, but I decided to make the frames slightly over-deep and not have to worry about spaces, fillers and such. I made this router jig (thanks to the Wagner brothers from Minnesota for this idea from their Gray Seal series in WoodenBoat magazine) to simplify the process. The previous plank sets the angle for the router. This shows the second plank's flat, but the garboard's flat was cut in the same way.
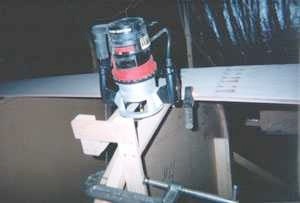
The router in place. The object is to create a flat from the beginning of the plank bevel, already cut here, to the top of the mould at the next plank's upper (lower to us as the hull is upside down) land mark. In practice we were getting slight gaps near the first plank's edge, but this can be corrected by adding a small bit of wood or using some thickened epoxy to fill the gap.