Between the main updates of the site itself, I’ll try to put some smaller items of news onto this page. Complete with RSS for those into that sort of thing.


Still Building
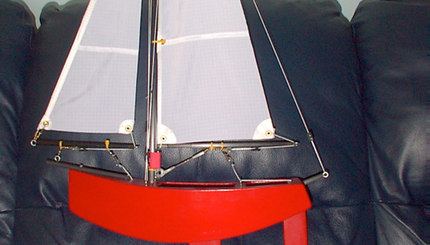
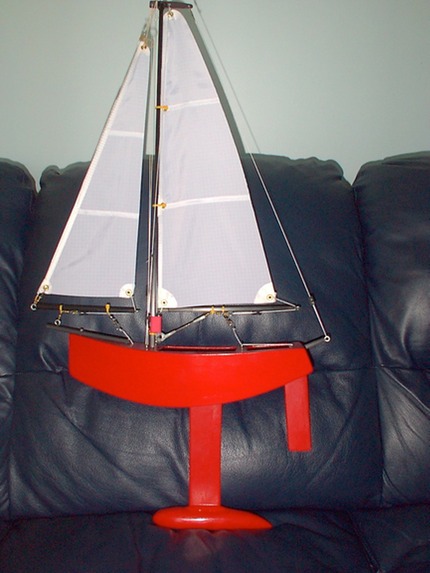
My new boat building project, shown above is a Footy. These fun little boats originated in New Zealand a few years ago. I built this one to the “Bob About” design but it came out a little too long, so I’ve named it “Bigfoot”.
Footy boats are radio controlled sailing yachts that are no more than 1 foot (305 mm) long and must meet stringent measurement rules. The radio gear is a standard 2 channel affair that can be had for very little money. The boats are made from thin sheet balsa wood (like mine), fiberglass, thin plywood, etc. The class is a development class, which means lots of experimentation is allowed and at this scale new ideas can be tried out very inexpensively.
Try one!
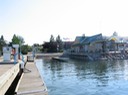
A Perfect Day To Sail
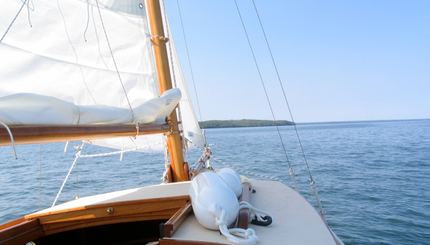
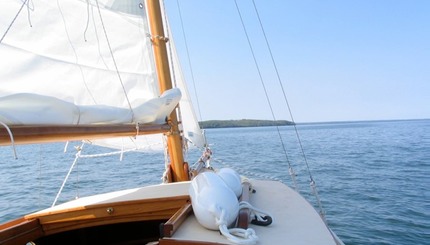
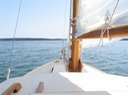
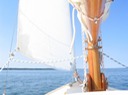
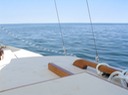
We took Alistego out to the lake yesterday for a perfect afternoon of sailing.
Before I begin the story, the impatient can find the pictures at this link. Yes, I know it’s bad form to leave the fenders like they are in the above picture.
Rigging took just over an hour, but again I feel this could be improved upon with a few more streamlined operations. To speed the process up I use snap shackles in all places where it is safe to do so. The goosenecks have been fitted with quick release pins rather than bolts. There is a lot of clutter (halyards, lazy jacks, stays, temporary fore stay, etc.) to keep under control so careful organization pays off big time to avoid spending a long time untangling the mess. I have found that a detailed checklist in a waterproof sleeve helps keep everyone on the same page.
Once we motored into the clear the first order of business was to hoist the mizzen, holding the boat into the wind, and then hoist the jib. For those of us new to gaffers: don’t forget to run the jib traveller out to end of the bowsprit! She does sail like this but there is quite a lot of weather helm. Don’t ask, I think you can figure out how I know this. Jib backed and tiller over for a speed of 0 kts or 1 kts in reverse and lunch was served.
Once lunch was done it was time to go sailing. The conditions were light winds with little wave action but we decided to get going under mizzen and jib alone. This netted us a startling 0.8 kts, so we hove to and hoisted the main. I’d suggest some mechanical help here, single blocks require a fairly large effort. The boat is designed to have all sail up in only the lightest of conditions, normally she’s sailed with one reef, and with two in very windy weather. Not knowing anything about how she would behave (and to practice this necessary procedure) we decided to set the main with a single reef.
We were close to the wind on a port tack for about an hour and she balanced well with just a polite amount of palm pressure needed on the tiller. We managed 2-2.8 kts or so with just a bit of heel. On the low side of the cockpit I could just put my fingers into the water. When the wind increased every now and again, I could feel the bow rise slightly and the acceleration was immediate with no additional heeling.
She is responsive to steering even at very slow speeds such as when when coasting up to a dock. There is quite a lot of water noise from the laps, as the bow cuts through the waves and of course from the bilge board cases. The motor well hasn’t splashed any water into the cockpit so far.
It does help to let the mizzen out just before tacking, not too far though, we managed to foul our sheet on the bumkin end- keep a boat hook on board- otherwise it will hold you into the wind half way through. We waited for the jib to back a bit to help bring her around but it may not be necessary.
On the new starboard tack we hit a hole in the wind and came to a near standstill. We decided to take out our reef and see what the full main sail could do. It was so calm that we just let the mainsheet go and took the reef out while on course. Without the reef the sail set beautifully with not a single crease or wrinkle. Soon we were back in the wind and scooting along at 3 kts or a bit better. Interestingly the other sailboats on the water seemed to be heeled way over on their ears but our small amount of heel didn’t change much throughout the day.
With the afternoon wearing on, we pointed a bit more downwind and headed back to the marina. The chop was now coming up, along with a freshening breeze, but we didn’t feel the slightest need to reduce sail. Too soon the marina was in front of us again as we hove to and dropped the main first, followed by the jib and our faithful mizzen last. I fired up the outboard and motored back in, noting that the marina flags were now standing straight out as the after work fishermen began arriving.
Alistego still gets an unusual amount of attention. Everyone looks and points as we drive by, one powerboat came right up, stopped, took some pictures, and we had a slow sail past by a Tanzer 22 and her skipper. While parked at the pizza place for dinner most cars slowed down for a look, a few stopped, and one circled her a few times before going on. Even the patrons at an open air pub called out their compliments as we went by.
So there you have it. Our first afternoon on the boat and nothing but very good feelings about how she performed. The crew still has some learning to do but I think we’ve made a very good start.
Launch!
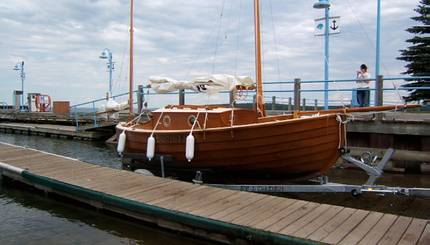
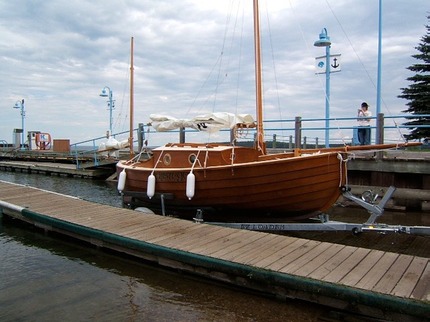
Yesterday, we launched the boat.
The day started out very slowly with loading everything onto the boat and securing it all for road travel. We were away much later than I had wanted but the boat trailed behind the Jeep very nicely with the trailer brakes working well but not in an obtrusive way.
We arrived in Cold Lake in time for lunch and a bit of shopping for the few odds and sods that you always need at the last moment. While in the parking lot we got a lot of slow "drive bys" and one local sailor stopped to find out about the boat and snap few pictures.
Finally, on to the marina for rigging and launch. Rigging took a hour and a half or more but I'm sure with practice, and with the four of us, we could be a lot faster. Again, lots of people were commenting about the boat (all positively-the word craftmanship or workmanship came up often, and yes, I did blush some). Our friend from the parking lot came by to get more pictures and just to look at her. All the while I had my eye on the darkening band of cloud on the western horizon and mumbling stuff like is this a good idea?
Once the rigging was done, there were a lot more people "just hanging around" than there usually are, but the time had come. On backing the boat down the ramp, I knew this was a different event for the marina when I saw all the cameras come out and one lady even had her video camera recording the event. Sadly our own video camera got left at home, but amazingly, we did remember all the bits for the boat including the jib traveller, that I was sure would be left at home. She backed down easily and before I knew it my wife, Barb, announced "she's in the water, but not floating yet". So, with the Jeep's rear wheels in a few inches of lake water she floated free for the first time with only the slightest push from me.
The first order of business (before detaching from the trailer) was to send our daughter onto the boat to look everywhere for possible leaks, especially around the bilge boards, which I had nightmares about. In reply to her dad's frantic requests for news about the state of the bilges, she replied, "There are cobwebs, it's totally dry."
Once she was floating nicely, and dryly, we planned our exit strategy. Since many sailboats don't back well, or at all, we decided to turn her around and head away from the ramp going in the right direction. Once the outboard was humming along, I clicked her into "F" and headed for open water. I had to pop the motor into neutral once in a while to keep her speed down in the marina, but she handled and steered like she should, and soon, we were out and heading into open water.
Those dark clouds were still around as we tried different kinds of turns, reversing, etc under motor to get a feel for her handling. It may just be a bad first impression or the conditions, but she didn't seem very responsive in reverse but we only tried it out for a few minutes.
We cut the engine and refueled to be sure we could run from the weather if needed. We decided to test the yawl's reputation for being able to stay head to wind with the mizzen up and sheeted in. She behaved exactly as expected , and the way she was swinging around with the wind, we could see what kind of sailing day we had. The wind was gusting strongly or not at all as I went forward to hoist the jib, we wouldn't be flying the mainsail in those conditions.
Under jib and mizzen, Alistego was sailing for the first time! Through my euphoria, I did note that the mizzen needed little tending, staying set and drawing quite well at all times. The jib may need to have the sheet fairleads adjusted, so I'm glad I made them adjustable. We sailed back and forth for a while just getting the feel of how she handled and chasing the wind around, as it shifted. There were times where I felt we were barely moving and others where she put her shoulder down and the bilge boards were humming. The boat felt stable and easily controllable, even for a guy who hasn't sailed at all during the five years it took to build her.
Barb phoned her parents to report the happy news of our launch and her dad, after congratulating us, told her that there was some severe weather headed our way, and from the skies around us, I believed him. The gusts were getting more intense and some rain could be seen around the area. Reluctantly, we changed course for the marina and tacked our way back for a bit, but realizing how long that would take we decided to give our new outboard a little more break-in time. We docked again without difficulty, putting the outboard into neutral some way out and letting her slippery hull glide through the water for the last 20 metres or so to the dock.
It takes very little to drive this boat through the water. There was never a wake to speak of, except for the exhaust stream from the outboard under power.
It was a shame that the weather shut us down after only an hour or two but we can hardly wait to get her out again!
Something Different
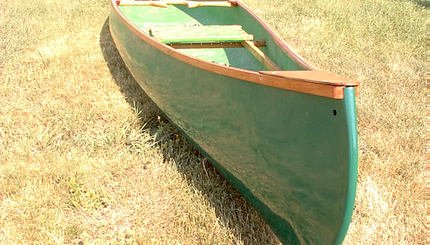
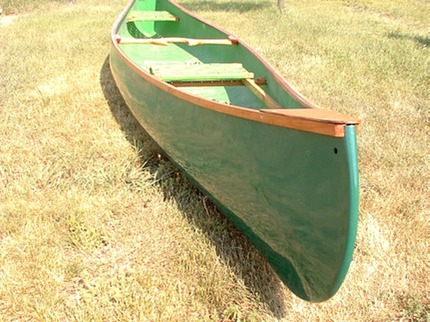
Our friend, Wayne, came out over the Canada Day weekend to pick up his canoe that we had in storage here.
He built this fiberglass canoe using the moulds of a canoe club he belonged to 25 or so years ago. He figured we’d just put on a quick coat of paint and be ready to go, but I wasn’t too sure. Some of the wood wasn’t looking too good the last time I looked.
So up early and out to the canoe only to discover that while the interior wood was still serviceable, the outwales were truly rotten! What to do? It happens that having another boat being built provides for some nice old growth Douglas fir, but we’d have to scarph shorter pieces to get the right length. Meanwhile we took all the wood out of the boat and started preparing it for refinishing.
Day two had us putting a coat of nice green Brightsides onto the hull which turned out beautifully. The rest of the day was a comedy of errors in woodworking that I’d just as soon forget about. My story is that the heat made me screw up, but at the end of the day, instead of varnishing in preparation for assembly the next morning, we were epoxying a break and a crack that resulted from trial fitting the almost completed outwales into position.
Day three had us sanding and finally varnishing the outwales, but they would have to spend a few hours drying before we could assemble the boat for the road and time was very short, so one coat would have to do for now! Around 2 pm the things were finally dry enough to handle and we spend the next two hours bending and screwing the new wales into place.
At about 5 pm, the canoe is loaded onto Wayne’s Blazer and he headed out on his six hour drive home.
Cushions!
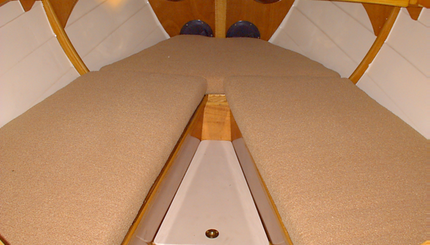
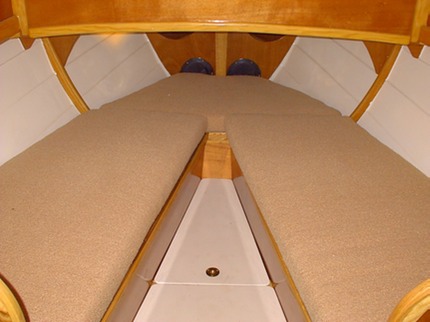
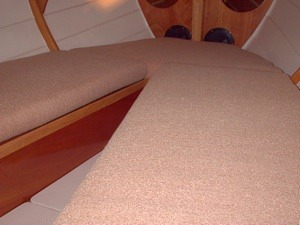
It seems like such a long time ago when I would sit in the empty shell of our hull, imagining the interior of the cabin complete with all the comforts, like cushions. Today, we realized that vision of the future.
As the picture shows, we chose a gold-ish colour that goes well with the oak and Douglas Fir bright work. They were made by a small company near here that primarily makes truck tarps, and were willing to make a set of boat cushions to my pattern.
I’m thrilled with the results. The fit is very good, especially around the frames and Samson post cutouts. The three inch closed-cell foam has a fiber fill outer layer that makes them very comfortable and allows them to breathe.
Trailer Tales
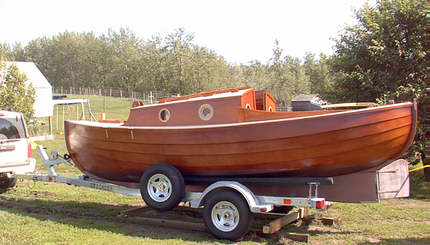
While not strictly a part of construction, the move onto the trailer is a significant event, so this blog entry will describe the process we used. You can see the pictures here.
The first step would have been unnecessary if I had put her back into the shed stern first after rolling the hull over. Too late for that, so she had to be pulled out into the yard on some 4” x 4” skids so we could get the trailer and our tow vehicle into position in front of her.
I tried to get the width of the bunks as close to their final position as possible by test fitting the station moulds to the trailer in advance. Rather than final positioning, I tried to set the trailer up for easy loading using the rollers to take most of the boat’s weight. Luckily the height of the boat was pretty close to the height of the trailer.
So began the process of jacking the boat, the bow at first and later the stern, to allow the trailer to be positioned under the boat. The blocking needed to be repositioned often to clear the trailer frames.
As the trailer took the boat’s weight and was steadied from side-to-side by the bunks, we began to dismantle the building “cradle” as it got in the way of the trailer. The pictures show how we needed to jack up the stern to avoid excessive friction on the bunks. The forward bunk supports were one setting lower to ensure the rollers did most of the work. This is why the boat is sitting rather bow down in the picture at the top of the page. This was easily adjusted later.
Board Hoist Trials

The picture above shows the setup I’ve used to experiment with the worm gear winches that I found on the web. They are through bolted to the bulkhead and are mounted to a one inch thick oak spacer block. I think they’ll make a neat and tidy way to handle the bilge boards. As supplied the winches have cable exit guides on the tops only. I’ve modified these ones so the line exits through a slot I cut in the bottom of each case.
The one on the left is equipped with 3/16 inch spectra line. The one on the right has 1/8 inch steel cable. As the photo shows the left winch has a straight drop while the other angles outboard somewhat.
My experiments have shown that the extra bulk of the spectra line creates two problems. First, it’s hard to get enough of the line on the winch drum to satisfy my need for several wraps remaining on the drum when the boards are fully down. Second, while the winch on the left worked fine with spectra, the one on the right did not. It was very difficult to lower and would “chatter” badly while lowering the plate. Once I switched to the steel cable (which is what the winches were designed to use) it worked flawlessly.
The other picture shows how I’ve rigged the cable entry into the bilge board cases. I’ve used a regular bronze through hull fitting and capped it with an ordinary garden hose fitting which will have a short length of plastic hose added to it to keep any splashing water out of the cabin.
What’s This?
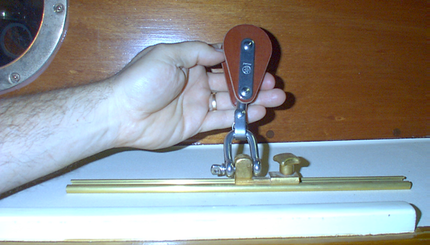
The picture above shows what I am going to try for the jib sheet fairlead on the boat. Alan suggested that the fixed bullseye sheet leads shown on the plans may not be in the ideal position for all situations. This is my idea for an adjustable sheet lead.
The brass parts are actually a Classic Marine “dinghy gooseneck” with the “spike” removed and a large shackle attaching a single tufnol block has been added to the assembly. I suppose one of those nifty springs would keep the whole deal from falling over when the sheet goes slack. I’ll also add a wooden base with nice ends so I don’t stub my toes on the exposed track.
Now This Is Spring!
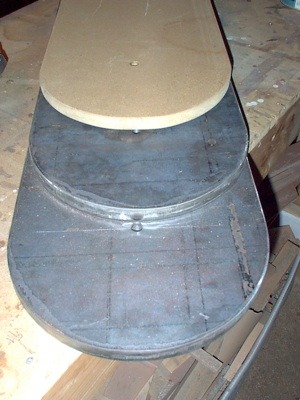
The picture above shows the two steel bilge boards needed for the boat stacked up along with the particle board pattern I made to check the fits etc. They are fabricated from 3/4 inch steel and believe me, these suckers are heavy! We’ll fool around with the light wood mockup to come up with a foolproof installation procedure. The last thing I need is to be fooling around with these things underneath the boat for any longer than absolutely needed. I’m going to coat them with cold galvanizing which should be OK as we sail in fresh water and she’ll live on the trailer most of the time.
I’ve also been crawling around under the boat finally sanding, coating, and anti-fouling the bilge keels and bilge board slot areas. The lead ballast is next for coating and finally anti-fouling as well.
After that, all that’s left is to install the keel bands and we’ll be ready to winch her onto the trailer once and for all.